
Golden Honey Sourdough Loaf
Cooking has been a passion of mine since early adulthood, but baking brought me a quiet peace I hadn’t known before. There’s something about sourdough specifically that feels grounding. The mixing, the waiting, the folding, and that first whiff of bread rising in the oven create a rhythm that slows me down, which is something I desperately needed in my life. Sourdough is an art that takes patience, and I’ve only come to understand it through trial and error and a lot of practice.
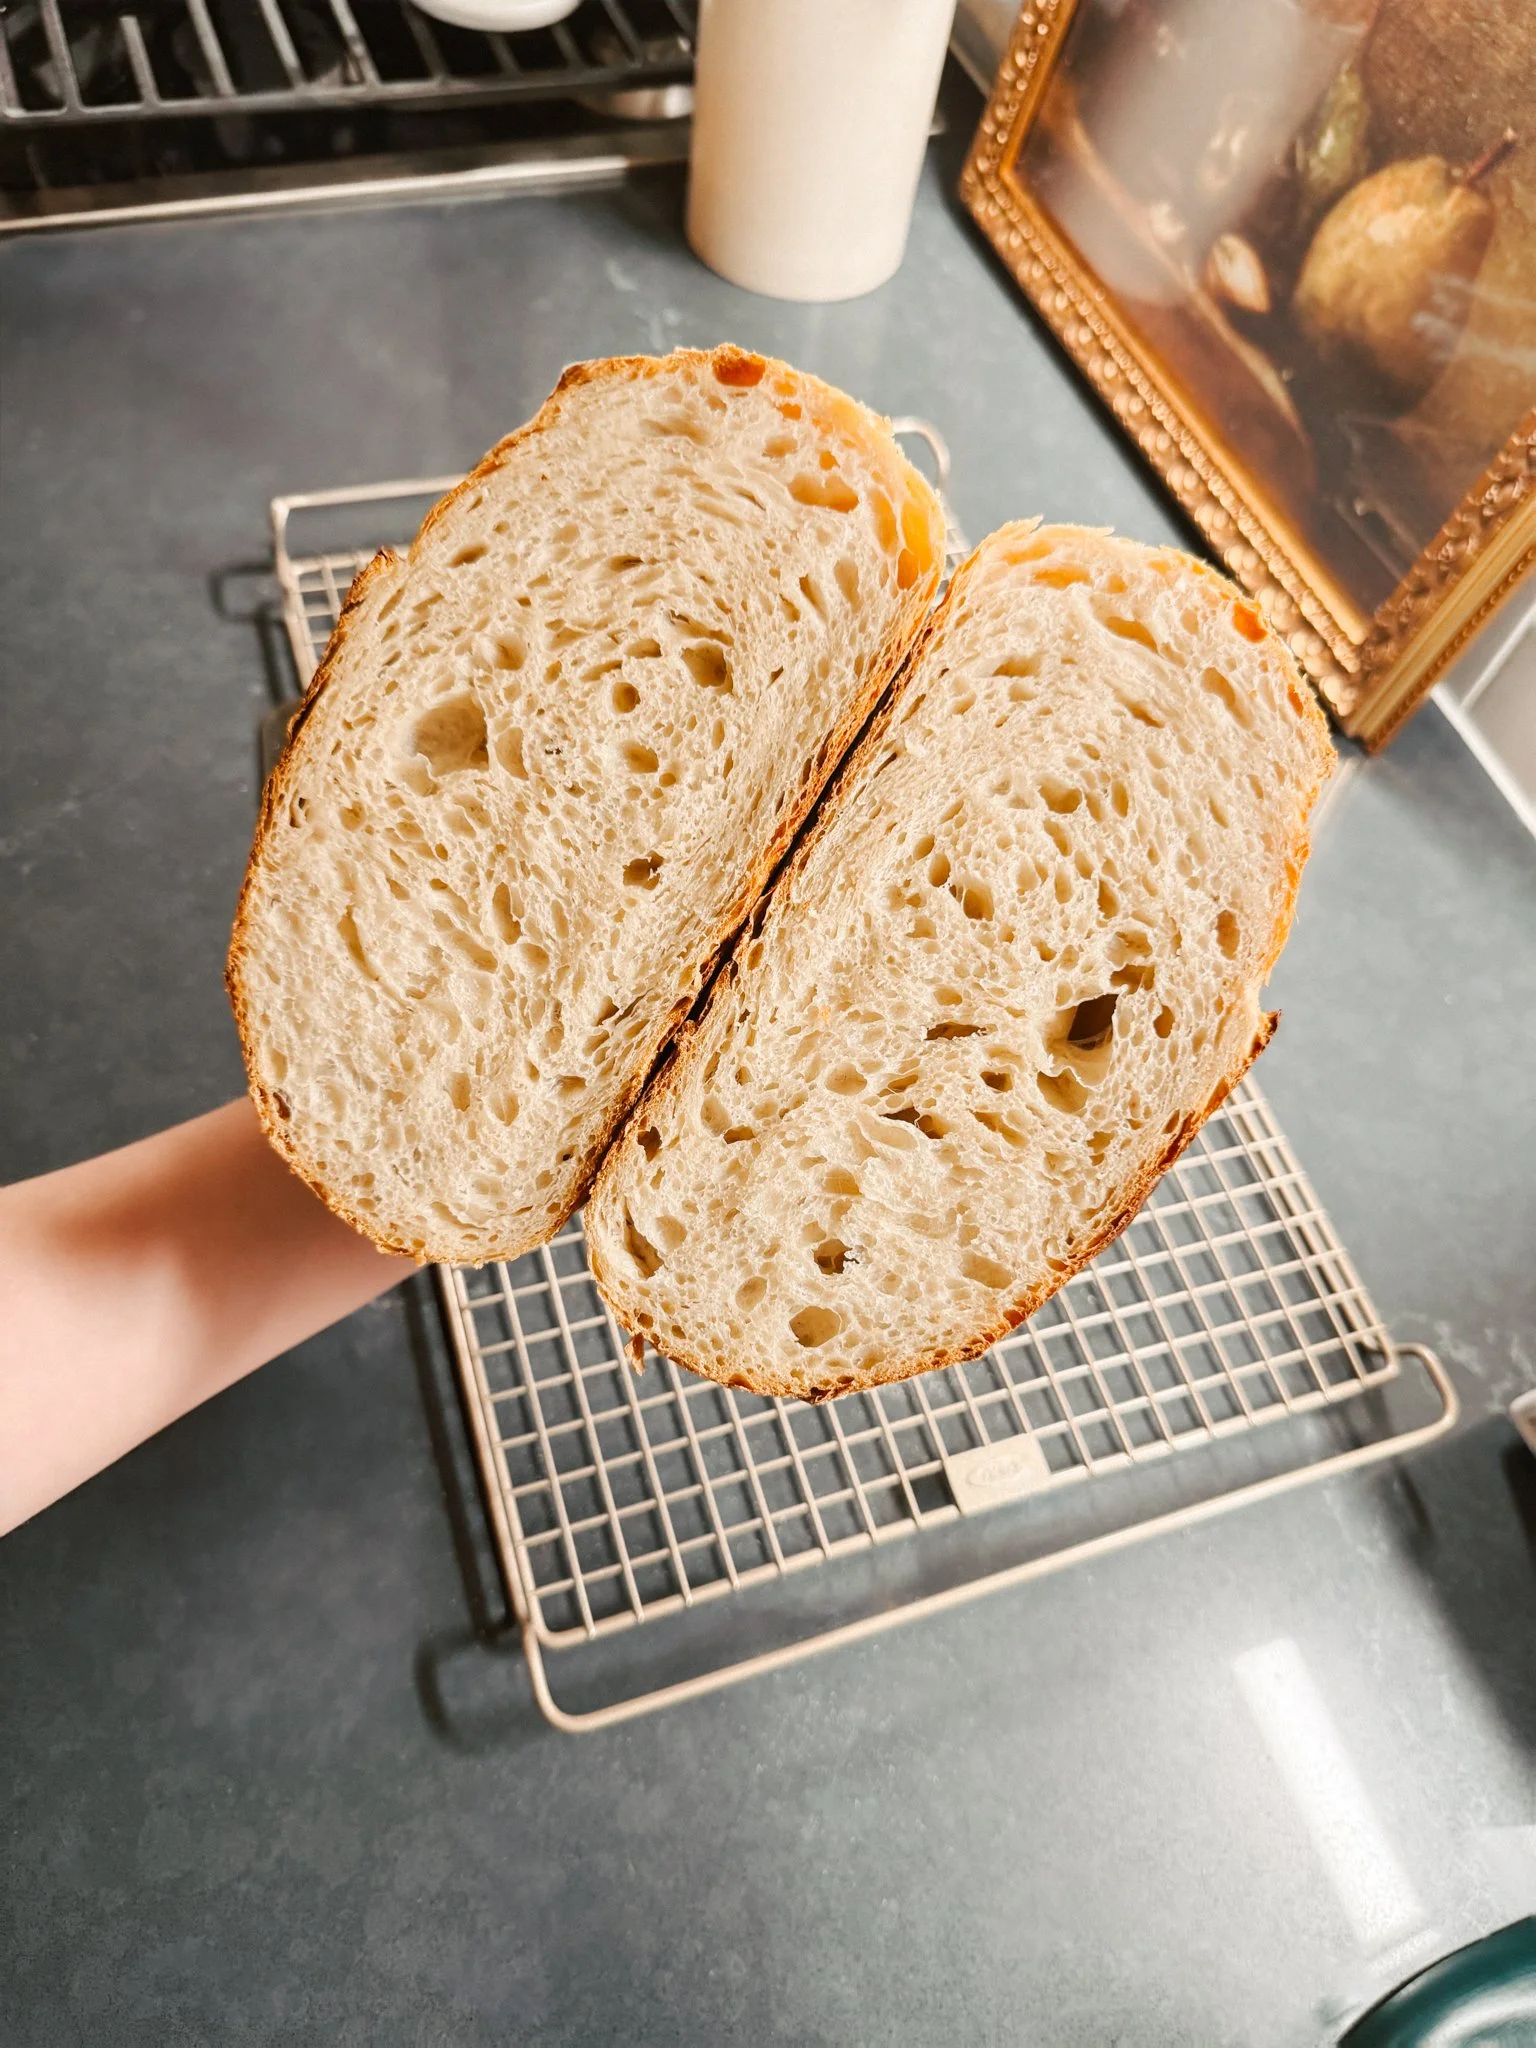
For the longest time, I felt torn between two kinds of bread. I loved the rustic, hearty loaves of traditional sourdough, but I also missed the soft, fluffy sandwich bread I grew up with. I wanted both in one loaf, something tender and cloud-like inside but with that satisfying sourdough crackle on the outside. A bread that could be sliced easily for sandwiches and toast, yet still carried depth and character. After more than 30 rounds of experimenting, tweaking hydration, adjusting proofing, and testing flour blends, I finally landed on the recipe that felt just right. Now, this Golden Honey Sourdough is the loaf my family eats week after week, the one we always come back to.
Why Golden Wheat
The difference lies in the golden wheat flour. Unlike regular whole wheat, which can sometimes feel heavy or a little bitter, golden wheat adds a gentle sweetness and soft nuttiness. It deepens the flavor without weighing the loaf down. Paired with bread flour, it gives structure while keeping the crumb pillowy and light. The golden hue it bakes into makes the bread as beautiful as it is delicious.
The Rhythm of the Process
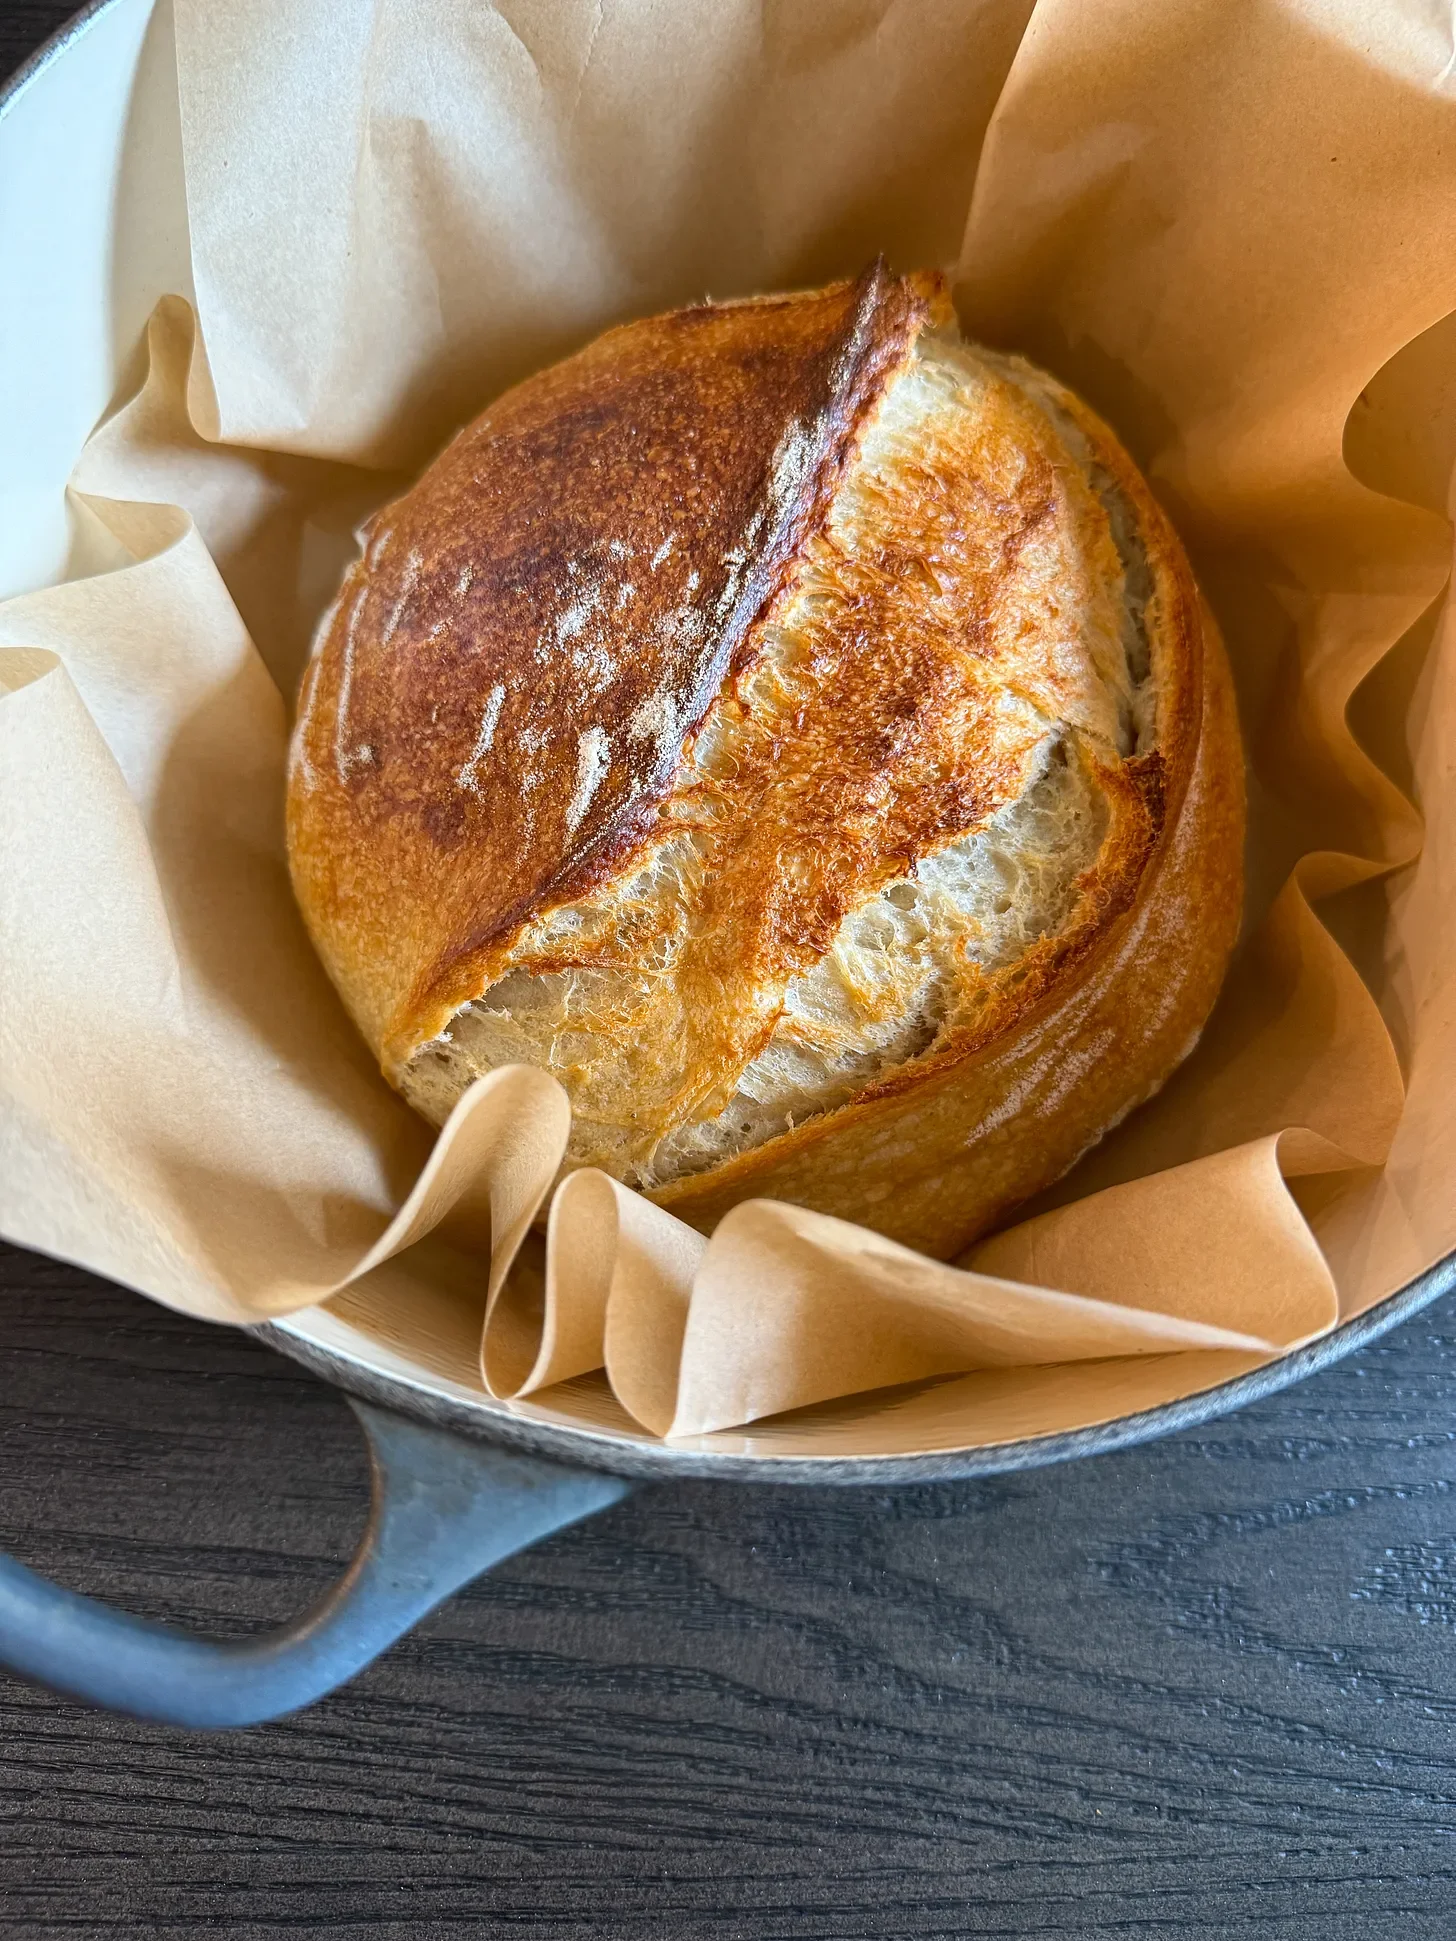
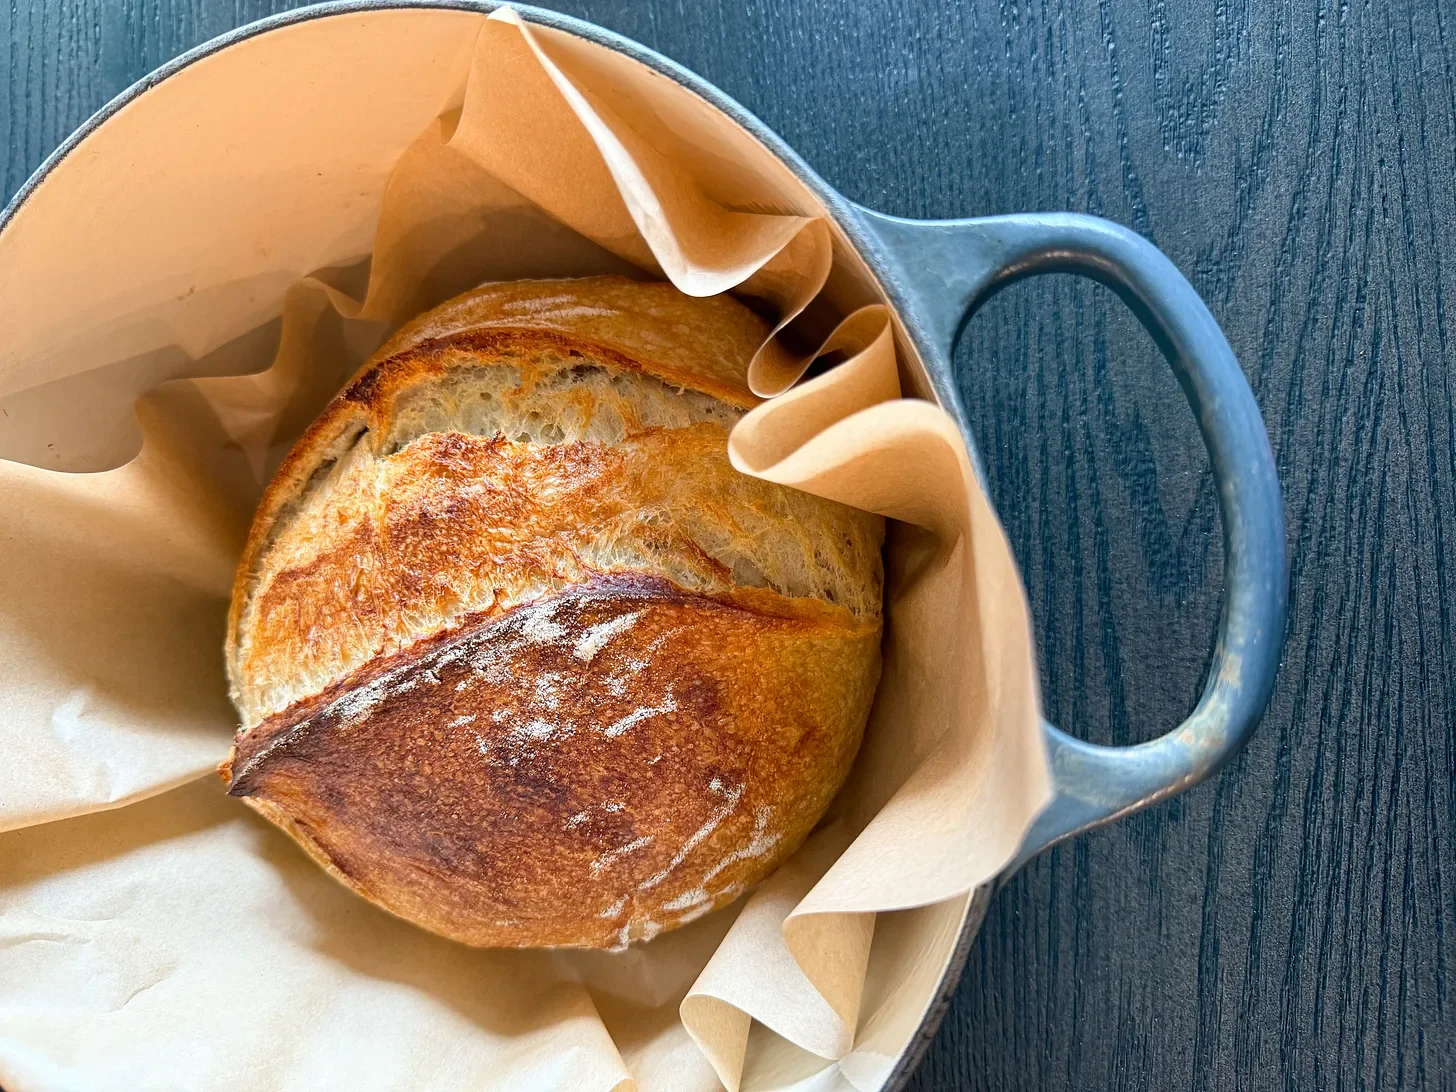
The process begins with the autolyse: flour and warm water are mixed and left to rest. It feels like nothing is happening, but during that time, the flour hydrates and gluten begins to form. After forty-five minutes, the dough already feels smoother and easier to work with. Mixing comes next. The starter, honey, powdered butter, and salt are added with cooler water to balance the temperature. Suddenly, the dough shifts from shaggy to elastic, strong enough to stretch thin without tearing. Bulk fermentation follows. You fold, you wait, you fold again. Slowly, the dough swells with air, bubbles rise to the surface, and the texture becomes glossy. A gentle jiggle makes the bowl wobble like jelly. After the bulk comes shaping and resting. The dough is pre-shaped, left to relax, then tightened into its final form. It goes into a banneton for an overnight proof in the fridge. This slow rise deepens the flavor, makes scoring easier, and allows for baking the next day.
The bake itself always feels like a bit of theater. The Dutch oven preheats, the dough is set on parchment, scored with a confident slash, and covered. Twenty minutes later, the lid comes off, a thermometer slides in, and the bake finishes until the loaf reaches 205 to 210 degrees. The crust turns golden, the ear lifts, and the whole kitchen fills with the smell of fresh bread. Cooling is the hardest part. The loaf needs at least an hour on a rack so the crumb can set and steam can release. Cut too soon, and the structure collapses and turns gummy. But with patience, you’re rewarded with a loaf that slices cleanly, stays fluffy for days, and makes sandwiches that feel like something special.
Final Thoughts
This Golden Honey Sourdough has become a staple in my kitchen. It’s the bread my kids ask for when they want sandwiches, the one I serve warm with salted butter, the one I bake again and again because it always delivers. After over 30 attempts, it feels like bread I earned through persistence and care. It is beautiful and practical, rustic yet soft, simple but full of character. I hope it becomes a staple in your home the way it has in mine.

Golden Honey Sourdough
A soft and golden sourdough boule made with bread flour, golden wheat, honey, and powdered butter for a creamy crumb, tender texture, and beautifully caramelized crust.
Ingredients
Instructions
- In a large bowl, mix the bread flour and golden wheat flour with 275g of warm water (about 90°F). Stir until no dry bits remain; the dough will look shaggy. Cover and let rest for 45 minutes. This rest hydrates the flour and kickstarts gluten development, making the dough easier to handle.
- Add the starter, powdered butter, honey, and the rest of the reserved room temperature (≤80°F) water. Mix by hand or with a spiral mixer.
- Gluten Development:
- (By hand) Knead or use the slap-and-fold method for 8–10 minutes until smooth and elastic.
- (By mixer) Mix 2–3 minutes on low, then 3–5 minutes on medium-low until the dough pulls away from the bowl. Look for: A dough that feels elastic and stretches thin for 2–3 inches before tearing (the “short windowpane test”).
- Sprinkle in the salt and perform your first stretch and fold. Cover.
- Perform three additional stretch and folds, spaced 30 minutes apart (four total, including the first).
- After the final fold, let the dough rest untouched until the dough has risen about 50–60%, the top looks slightly domed, small bubbles are visible at the edges, and the dough jiggles like jelly when shaken. Avoid over-fermenting—this moderate rise leaves strength for the cold retard ahead.
- Turn the dough onto a lightly floured surface, smooth side down. Using a bench scraper, tuck the edges under to form a loose round. Rest uncovered for 20 minutes until relaxed and slightly spread.
- Shape into a boule or batard, creating tension without tearing. Place seam-side up in a rice-flour-dusted banneton if you plan to score, or seam-side down for a natural crack. Cover lightly.
- Refrigerate for 12–24 hours. Cold proofing slows fermentation, develops flavor, and makes scoring easier. By bake time, the dough should feel firm and may show small blisters.
- Preheat your oven to 450°F for at least 1 hour with a Dutch oven inside.
- Remove dough from the fridge, invert onto parchment, and score at a 30–45° angle. Transfer to the hot Dutch oven using the parchment as a sling.
- Bake for 20 minutes at 450°F with the lid on.
- Remove the lid, reduce the temperature to 425°F, and continue baking until the loaf reaches an internal temperature of 205°F. Tent with foil if the crust darkens too quickly.
- Transfer to a wire rack and cool completely for at least 1 hour before slicing. This allows the crumb to set and moisture to redistribute, creating a creamy, tender interior.
Notes
- Use 90°F water for autolyse, but switch to cooler (≤80°F) water when adding starter and salt to avoid overheating the dough.
- Autolyse is your friend. It reduces mixing effort and improves both texture and flavor.
- Watch the signs during bulk fermentation, not the clock. Volume increase, bubbles, and jiggle matter more than time.
- Cold proofing (overnight or up to 24 hours) deepens flavor and gives you flexibility in baking schedule.
- Always use parchment for easy transfer and to avoid sticking.
- A sheet pan under your Dutch oven keeps the bottom from scorching.
- Bake until the loaf reaches 205–210°F inside. That’s your foolproof signal, it’s ready.
- This same dough bakes beautifully in a sandwich loaf pan, giving you a softer crust and tall slices perfect for everyday use.